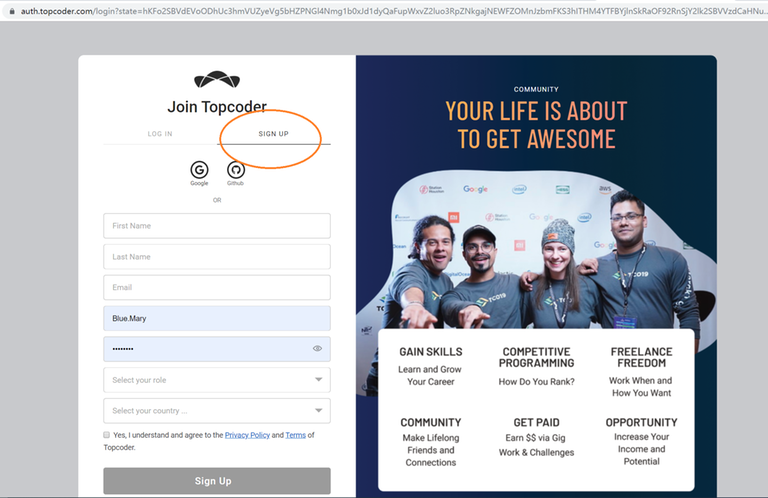
Step 1: Get a Topcoder account if you don't already have one.
Address: http://www.topcoder.com/talent/

Click on the "JOIN TOPCODER" button, and fill in the form to register.
Step 2: Download and install Java Runtime Environment.
Address: https://www.java.com/en/download/manual.jsp
Step 3: Download the topcoder applet.
Address: https://www.topcoder.com/contest/arena/ContestAppletProd.jnlp
I strongly recommend you to put the above jnlp into the same folder of executable file "javaws" (Java Web Start Luncher).
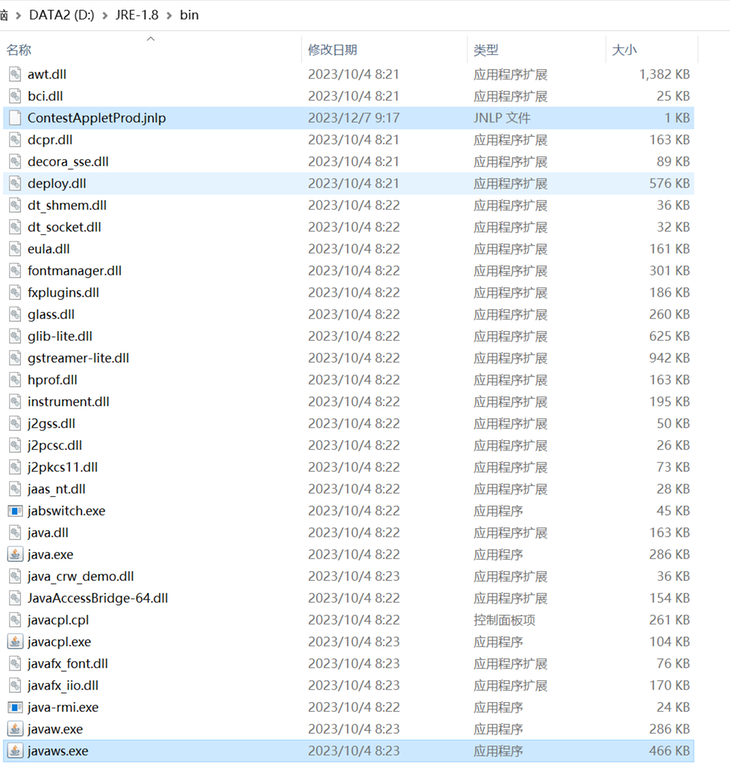
Step 4: Configure Java.
If you open the above jnlp directly from javaws, you will get the following error:
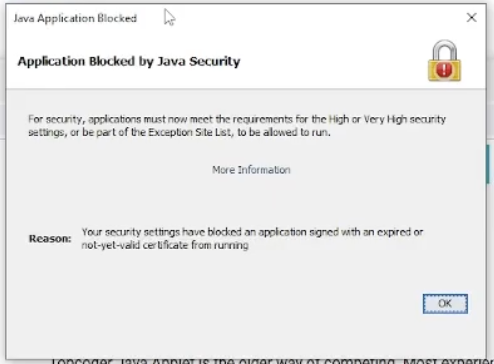
To solve this problem, open the Java Control Panel. For Windows users you can find it in Start Menu / Java / Configure Java.
For other operating systems, see https://www.topcoder.com/thrive/articles/installing-topcoders-vintage-arena for more information.
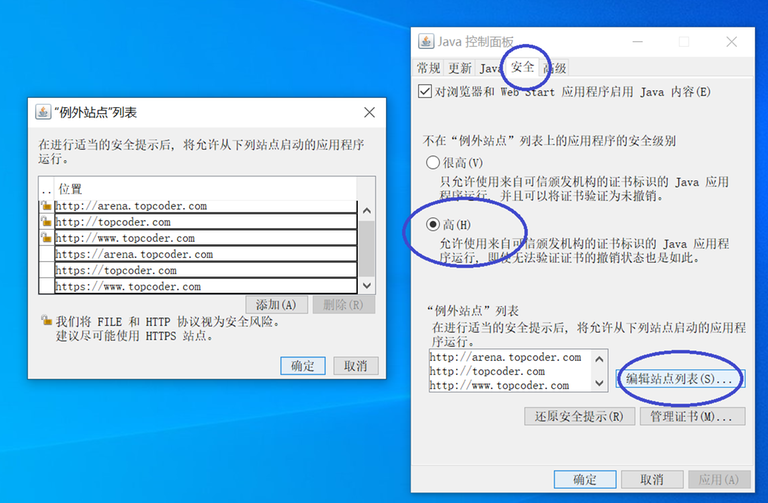
Click the "Security" tab, set the security level to "High", and then add the following six addresses to the list of exception sites.
http://www.topcoder.com
https://www.topcoder.com
http://arena.topcoder.com
https://arena.topcoder.com
https://topcoder.com
http://topcoder.com
Step 5: Login to the Topcoder Competitive Arena.
Use the command line "javaws -wait ContestAppletProd.jnlp" to open the jnlp file. This time you may get a warning, just press continue to move on.
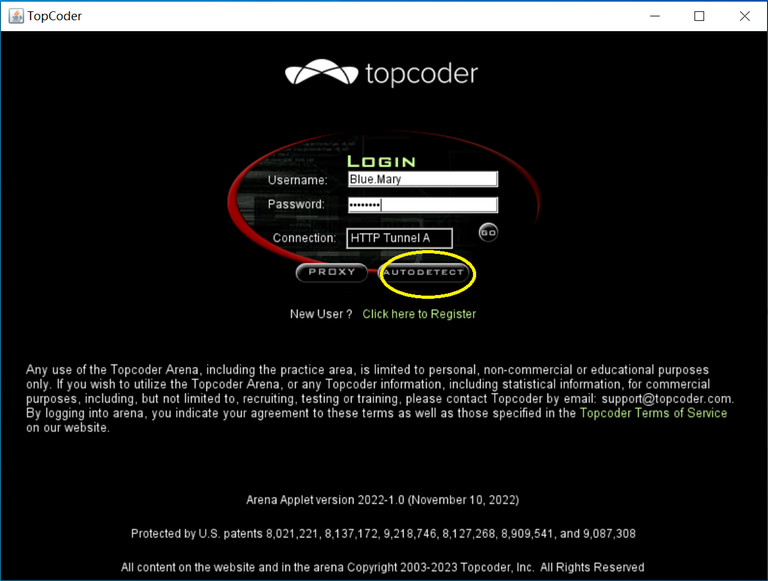
It's recommended to use the "AUTO DETECT" button to automatically check the connection type. Use your account and password to login.
Step 6: Download the plugin files.
Download these three jar files and put them in a folder.
https://community.topcoder.com/contest/classes/TZTester/TZTester.jar https://community.topcoder.com/contest/classes/CodeProcessor/CodeProcessor.jar https://community.topcoder.com/contest/classes/FileEdit/FileEdit.jar
Step 7: Configure the plugin in the applet.
In the applet, click on the "Options" tab and click on "Editor".
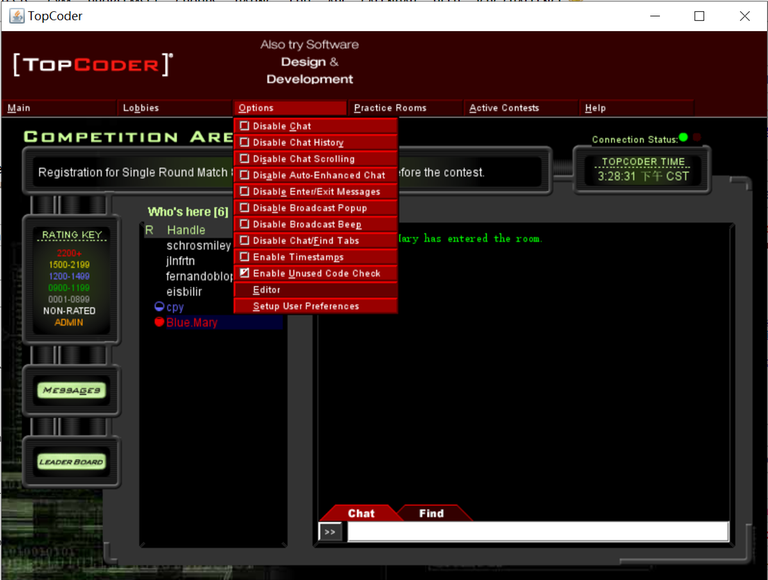
Click "Add". Fill in the form with the following (note that the following information is case sensitive):
Name: tangentz.TZTester
EntryPoint: codeprocessor.EntryPoint
Click "Browse" and add the link to the three jar files in the ClassPath. (After selecting the files, just press on the button on the left).
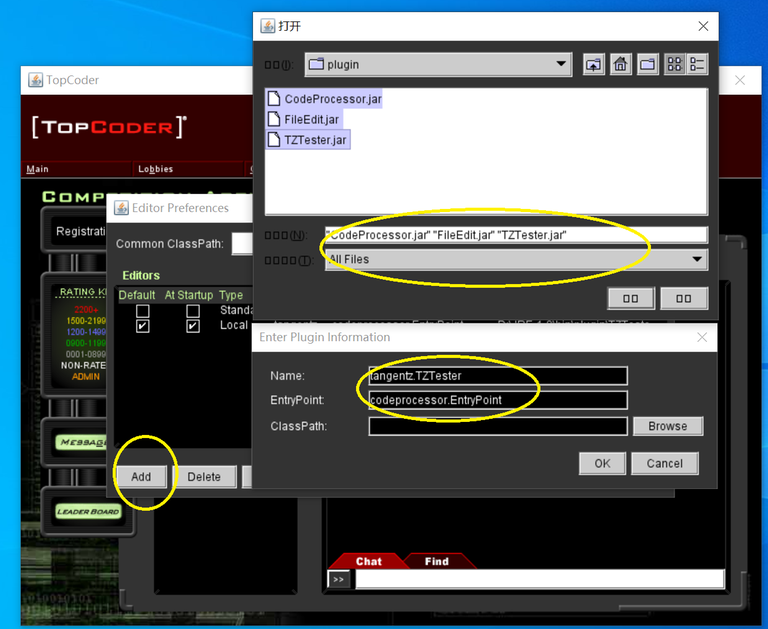
Click "OK" to save the above changes. Then press "Configure". Fill in the form with the following (note that the following information is also case sensitive):
Editor EntryPoint: fileedit.EntryPoint
Processor class: tangentz.TZTester
Click the "Verify" button, you should see the following information:
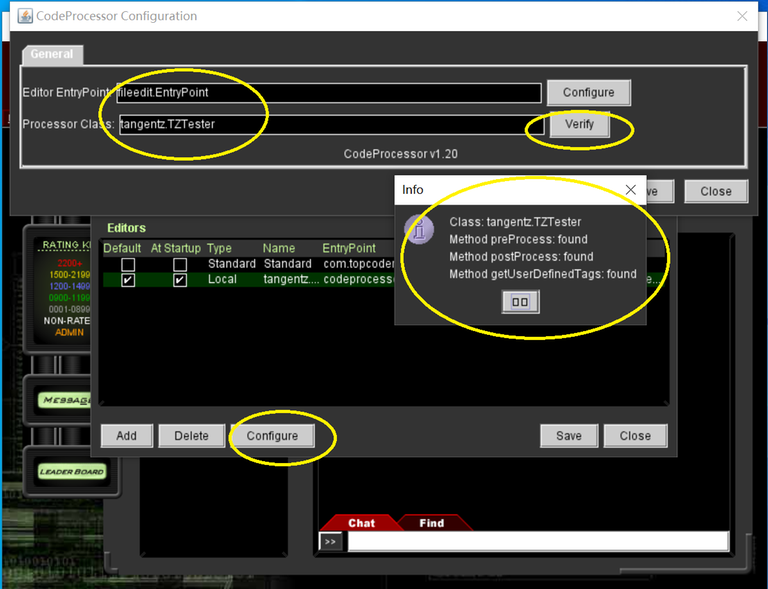
Press "Configure" , "General Tab":
In the first line, enter the directory where you want to put the problem statement file and the automatically generated program file.
It's recommended that you use the following configuration:
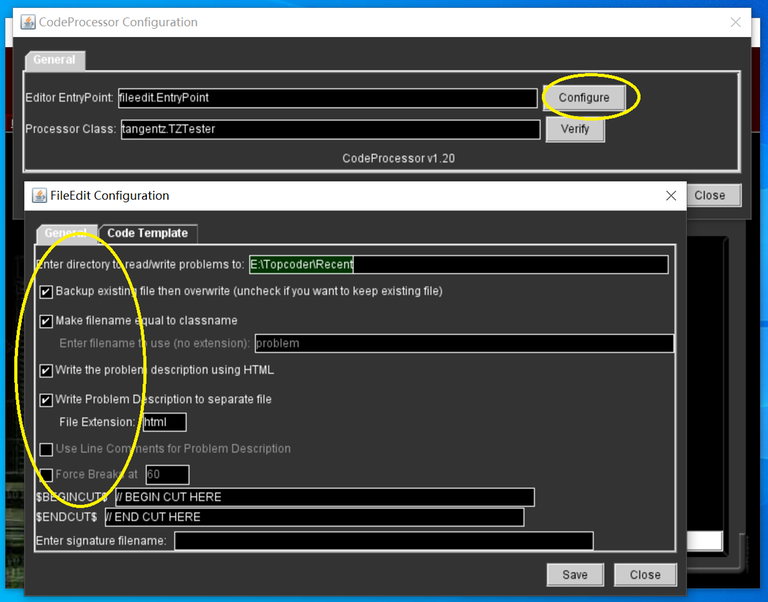
Then click on the "Code Template" tab. For C++ users, paste the following into the code template:
class $CLASSNAME${
public:
$RC$ $METHODNAME$($METHODPARMS$){
	$CARETPOSITION$
}
$TESTCODE$
};
// BEGIN CUT HERE
int main(){
	$CLASSNAME$ ___test;
	___test.run_test(-1);
}
// END CUT HERE
Your own code library can be placed before the first line of the above code snippet. For example:
#include<bits/stdc++.h>
using namespace std;
class $CLASSNAME${
public:
$RC$ $METHODNAME$($METHODPARMS$){
	$CARETPOSITION$
}
$TESTCODE$
};
// BEGIN CUT HERE
int main(){
	$CLASSNAME$ ___test;
	___test.run_test(-1);
}
// END CUT HERE
Then click "Save", then "Close".
Then click "Save", then "Close" (the second time).
Then click "Save", then "Close" (the third time).
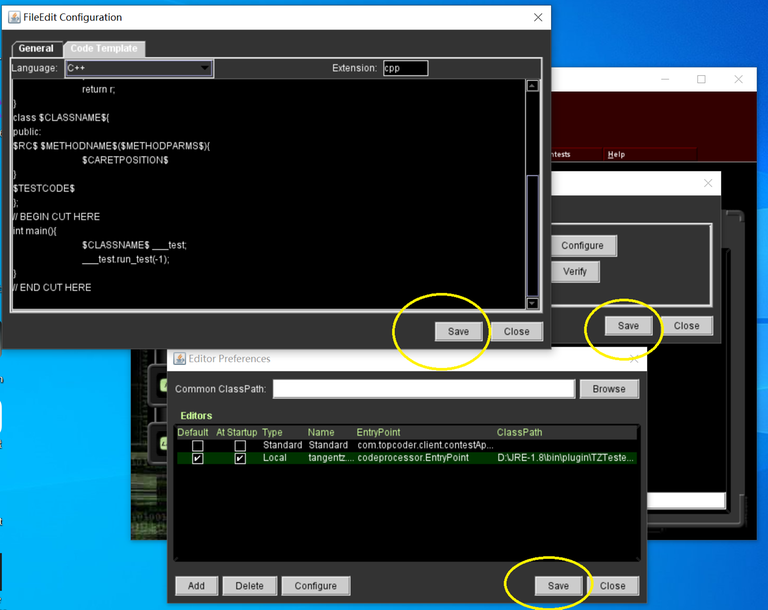
Step 8: Open any problem in Practise room to check!
After opening the problem, you should get a html file with problem description:
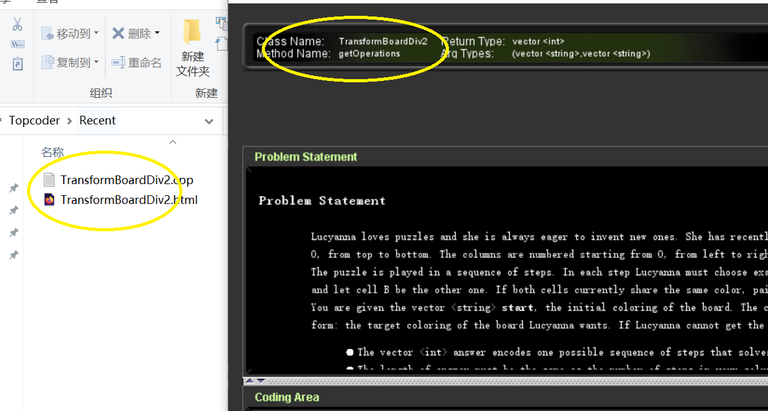
... as well as an automatically generated program.
After writing, compiling and running the program, you should get the following response locally:
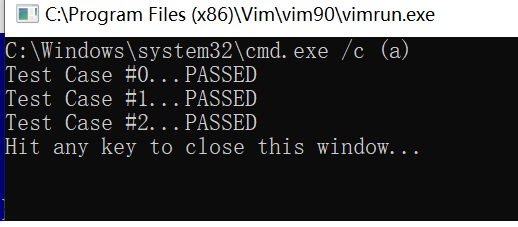
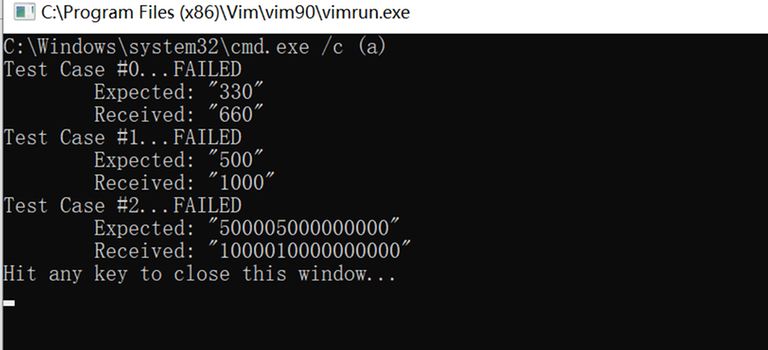
Or if your program is incorrect:
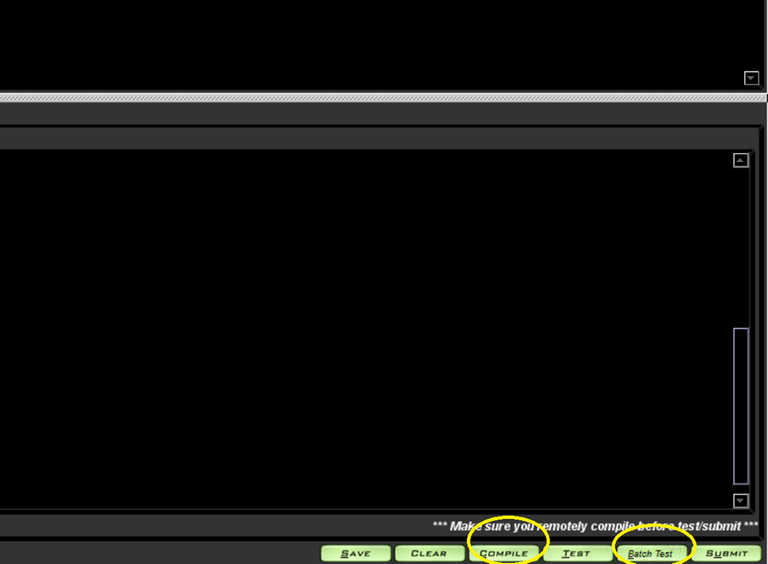
To test your program online, you must compile your source code first (online compiling is done by click the "compile" button). you can use the "Batch Test" button:
If your program passes the examples, the following should be displayed:
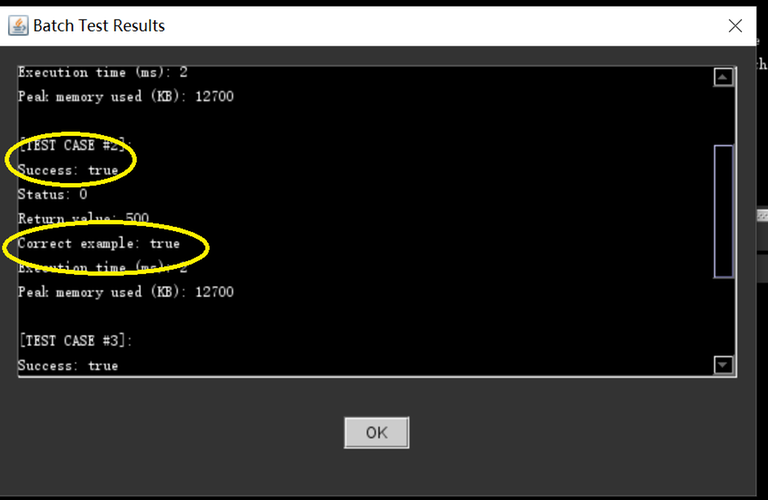
Note that "Correct example" (not just "Success") should be "True".


