Hello everyone!
I believe many MacOS users have encountered this problem (and it has been lasting for the entire history of programming) so I decided to post a blog to gain free contributions help them install GNU's GCC. GCC has many useful libraries that Clang (Mac's default c++ compiler) doesn't have. Such as the classic <bits/stdc++.h> and also the Policy Based Data Structures.
SO let's get to the tutorial. Have Terminal.app opened up because we will be typing a lot of commands. Type cd ~ in the Terminal and press enter, this makes the computer go to the root folder. I will assume that your Terminal is always in the root folder for this tutorial.
By the way, any time you think your Terminal is getting a bit too messy, type clear to clean things up.
Setting up Homebrew
Installing GCC
Now that Homebrew is ready, it's time to download what you came here for. This process is actually much simpler than installing Homebrew. All you have to do is type:
brew install gcc --force-bottle
If it doesn't work, try:
homebrew install gcc --force-bottle
--force-bottle just makes sure homebrew downloads the precompiled version of gcc (which is a lot faster to install than the original version).
Viola! Now GCC is installed!
Using GCC
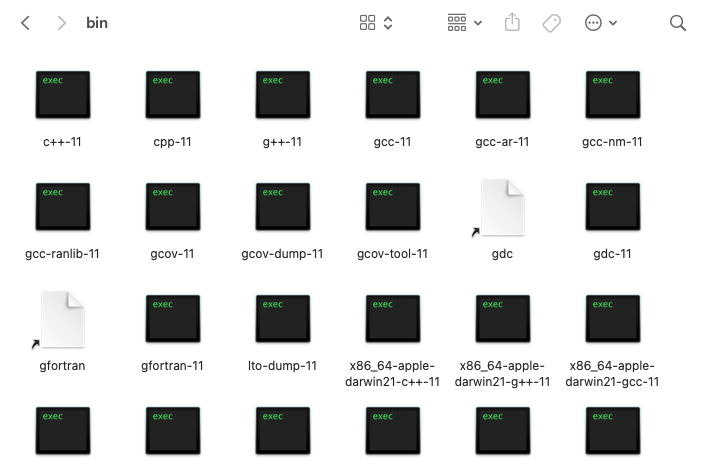
To compile codes with the newly installed GCC, we need to know the version of this gcc. Open up finder and go to the homebrew folder, then go to Cellar -> gcc -> (whatever version number is here) -> bin. Here in the bin folder, you can see the gcc and g++ versions.
As you can see I got g++-11 and gcc-11, so next time when you compile a c++ code, instead of typing g++ A.cpp, type g++-11 A.cpp. This will use the new GCC compiler instead of the old Clang.
Note: if you are using Sublime Text like me (or maybe some other editors or IDE that have this issue), you need to add source ~/.zshrc or source ~/.bashrc to your c++ build script to make it know where the path of the new compiler is.
If you want to only type g++ A.cpp, you can open up the ~/.zshrc or ~/.bashrc file again and add this:
alias g++='g++-11'
alias gcc='gcc-11'
Don't forget to source.
And that's pretty much it. I hope I managed to help some people get GCC on Mac. :)


Wow!
For finding brew in finder: Press
⌘ + ⇧ + G. This should open a dialog box. You can enter the folder path/opt/homebrew/Cellarto access the contents of the Cellar.Or, go to
Macintosh HDroot directory and un-hide the hidden files/folders by using⌘ + ⇧ + .(dot) then follow these directories to find GCCopt>homebrew>Celler>gcc.